There’s going to be a bit of a change to the regular Friday Blog cycle, as I feel that I deserve a break from the routine; at least for a week. So, instead of a thousand or so words talking about something opinion-worthy, I’m going to catalogue one of my most recent creative endeavours – my homemade Munchkin Level Playing Field game board – and how one might make one, were one into creative print ‘n’ play board game projects or that sort of thing.
Munchkin has always sort of disturbed me because the essence of the game is to advance your procedurally-generated dungeon-raiding character from Level One to Level Ten (with the winner being the first player to reach Level 10 first), but no materials are supplied with the base game with which to count levels and players must instead use some random tokens, coins, or pen and paper to keep score. Steve Jackson Games does, however, manufacture playing boards and playing pieces that can be bought separately (or as a bundle in the ‘Munchkin Deluxe’ sets), but I thought that – instead of simply ordering them online – it’d be more fun to try and make my own. This post catalogues the process of trying to put them together.
So, what does this thing look like? Well, the finished article looks like this:

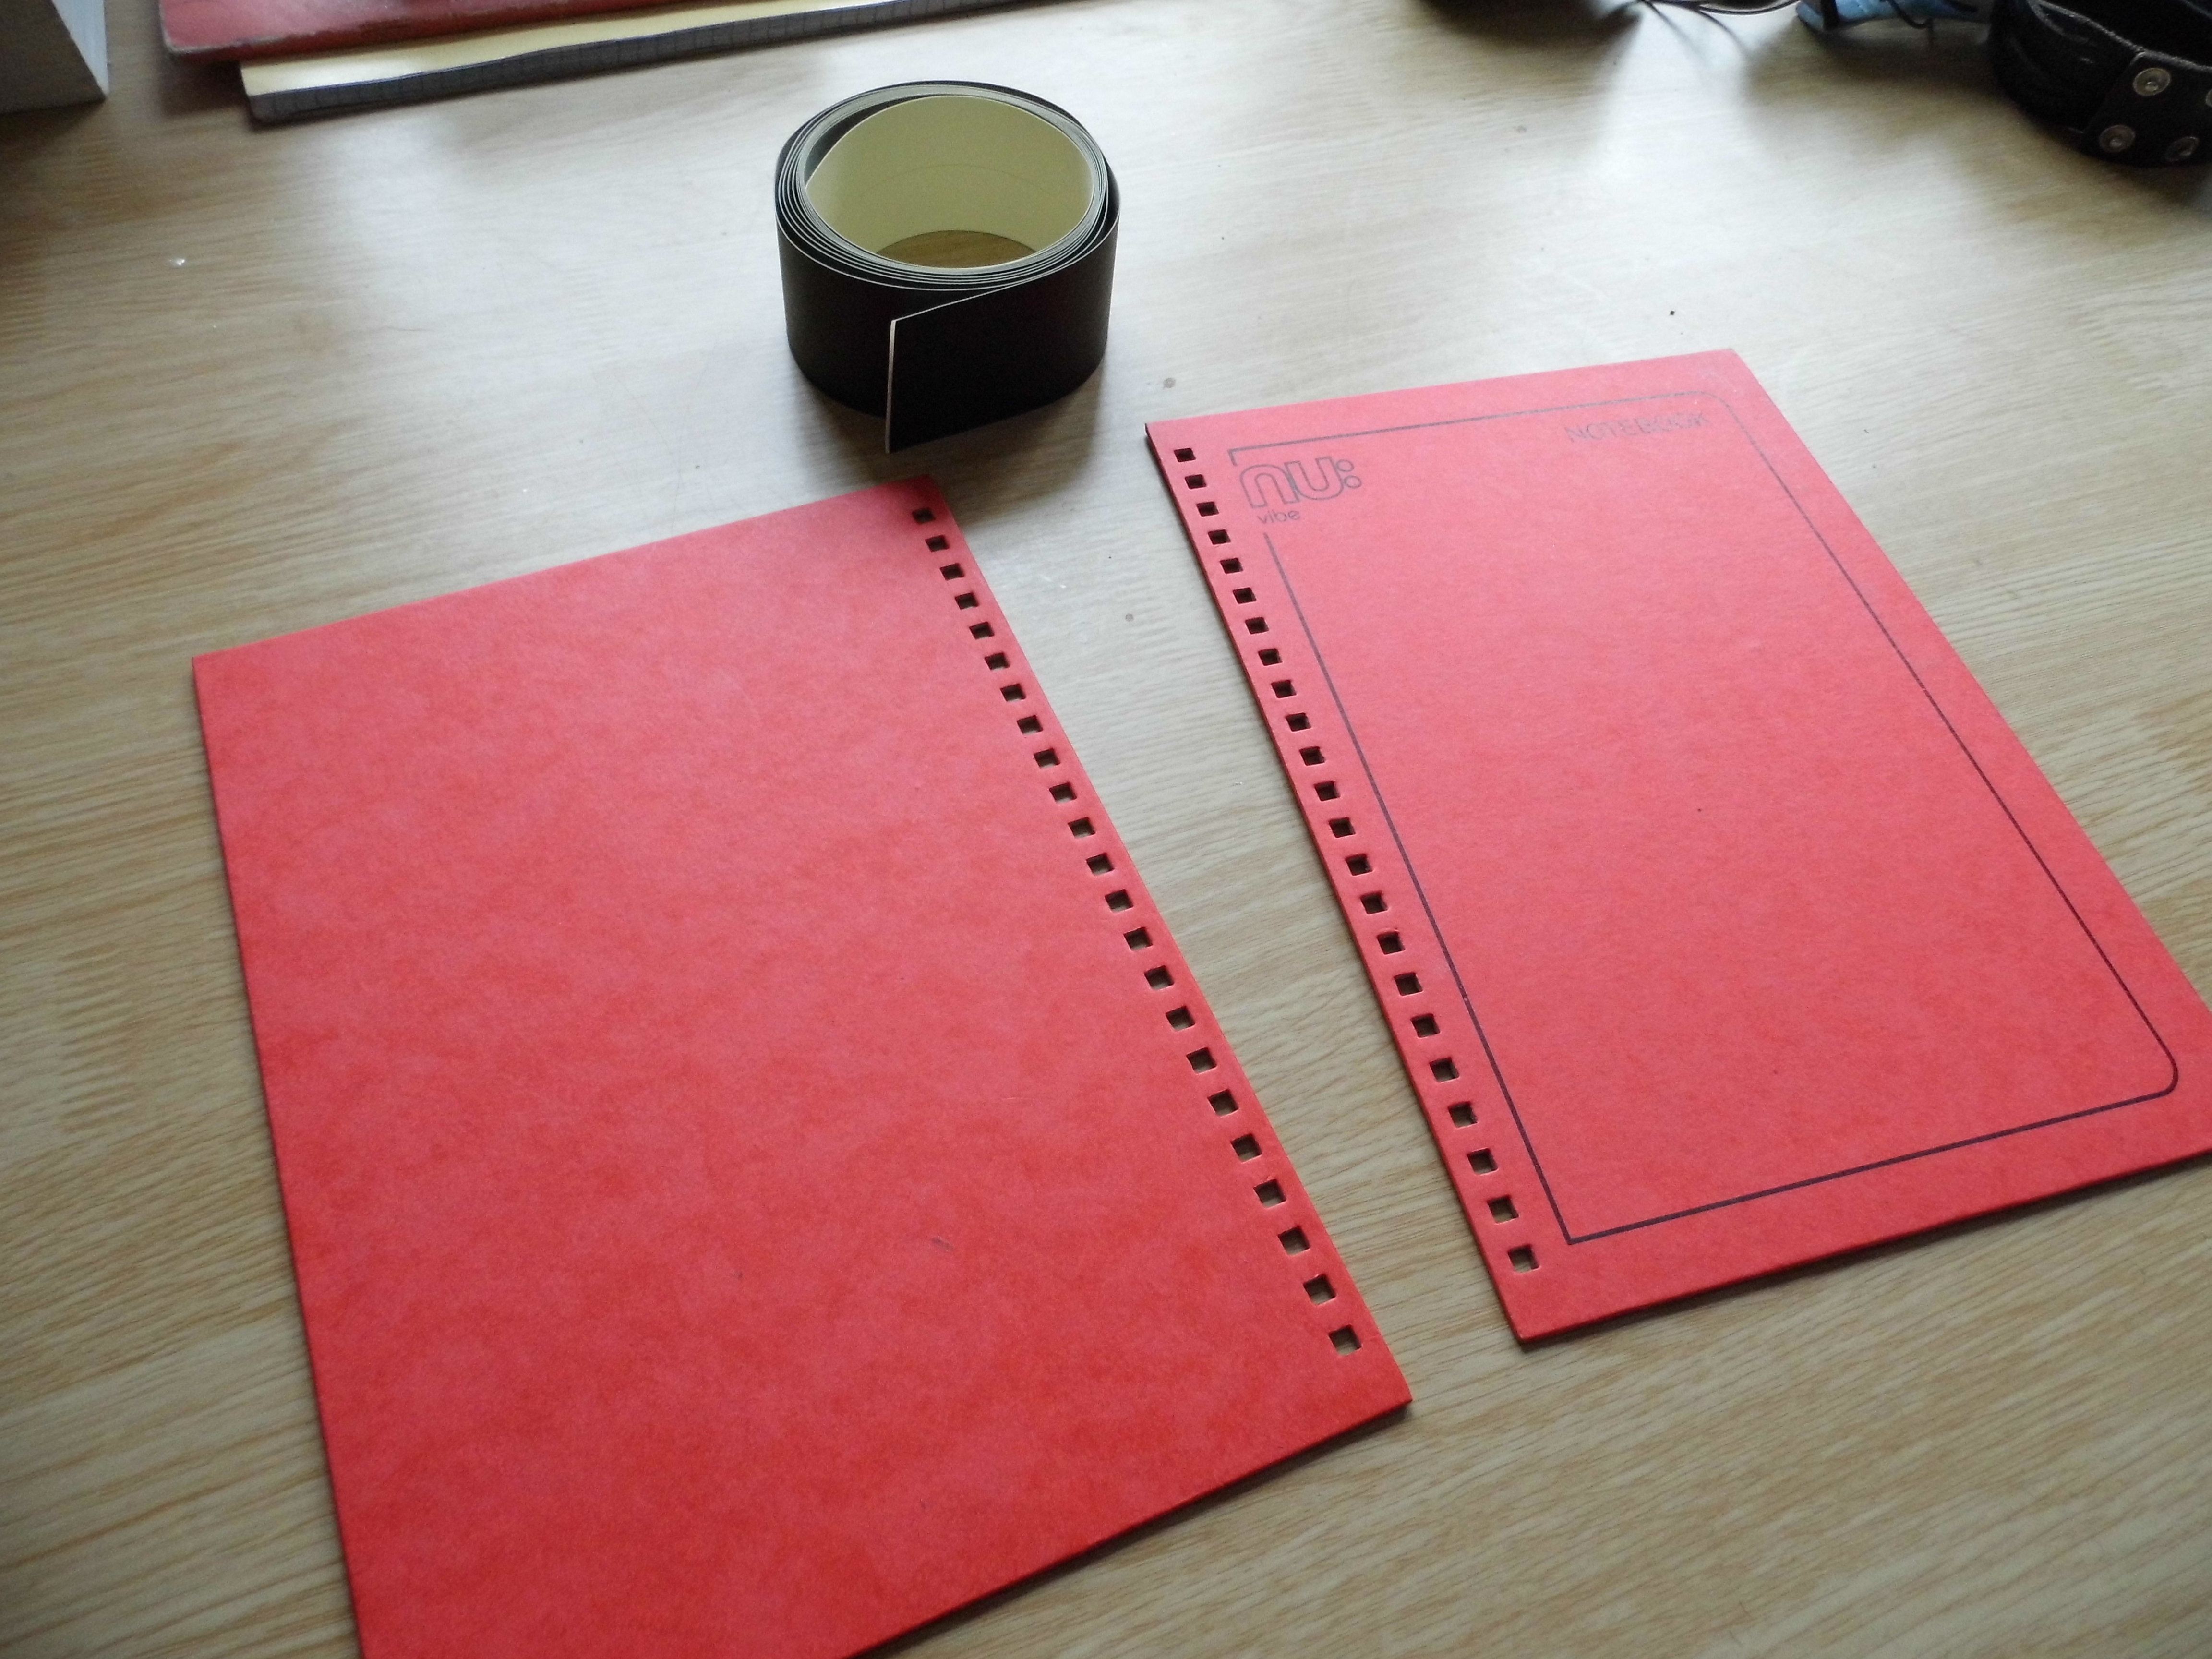
To put it together, I started with a plain hardback (A5) notebook from PoundLand (The Theatre of Dreams™) , and removed the pages and the metal spine so that I had just the front and back covers; which I (temporarily) taped together with book-binding tape to hold it together. I then sketched out a series of boxes, one to ten, along which the playing pieces would move in order to track levels.

I took the idea of replicating the Munchkin Deluxe board because I liked the idea of the board representing the dungeon that the adventurers are questing through, observed as a top-down view of a winding castle, or something. This way, it’s easier to figure out who’s in the lead and hence whether you want to either hinder them or lend a hand in return for bonus loot.
The next process was to paint up the background areas (green for grass outside the keep), and grey for the castle’s rooms. I used acrylic paints and a regular brush, and I quite wanted it to look ‘rough’ and weathered somewhat so I used quite a lot of dry-brush techniques to “scrape” paint onto the board. When I was done, I outlined the walls with a black Sharpie and then a silver-finish Sharpie for the inner section of the walls.

I wanted to add some definition to the inner walls, so I added a stone brick pattern to the outside faces of the walls with a very fine marker, just for funsies. I painted up the starting box (1) and ending box (10) up in more bright colours to reflect “Victory”, and designated each room with the relevant level number.
Because I wanted the notebook to represent a fictional dungeon-quester’s notebook (perhaps akin to a character notebook from Dungeons and Dragons), I wanted to give it a fantasy/role-playing feel so I removed the book-binding tape and replaced it with old, worn yarn that I found in the shed. I cut lots of thin strips of it (about 10-15 cm in length) and then tied them in loops through the holes of the original notebook’s spine. As a final flourish, I decorated the front of the board with the words ‘Munchkin Adventurer’s Notebook’, comme ça:


Right, so that’s the board finished, but what do we use to count? Well, instead of buying a Bag O’ Munchkins, I turned instead to shrink plastic to make some ~7 cm pieces to insert into plastic stands to represent each player.
I scoured through a bunch of cards from the base Munchkin deck to find some interesting characters, scanned the cards in and blew them up before printing them to a scale that the character was around 12 cm in size. I used Shrinkies clear shrink plastic, traced the outline with a black Sharpie and then coloured in the relevant area with other Sharpie pens. I needed 6 (because Munchkin plays three to six players), so to be sure of not screwing up, I made nine pieces and cut them out; making sure not to leave too many ‘thin’ bits because I found that these tended to warp very badly when fired in the oven.
-

- Prototype!

-

- Drawing!

-

- Pre-shrinking!
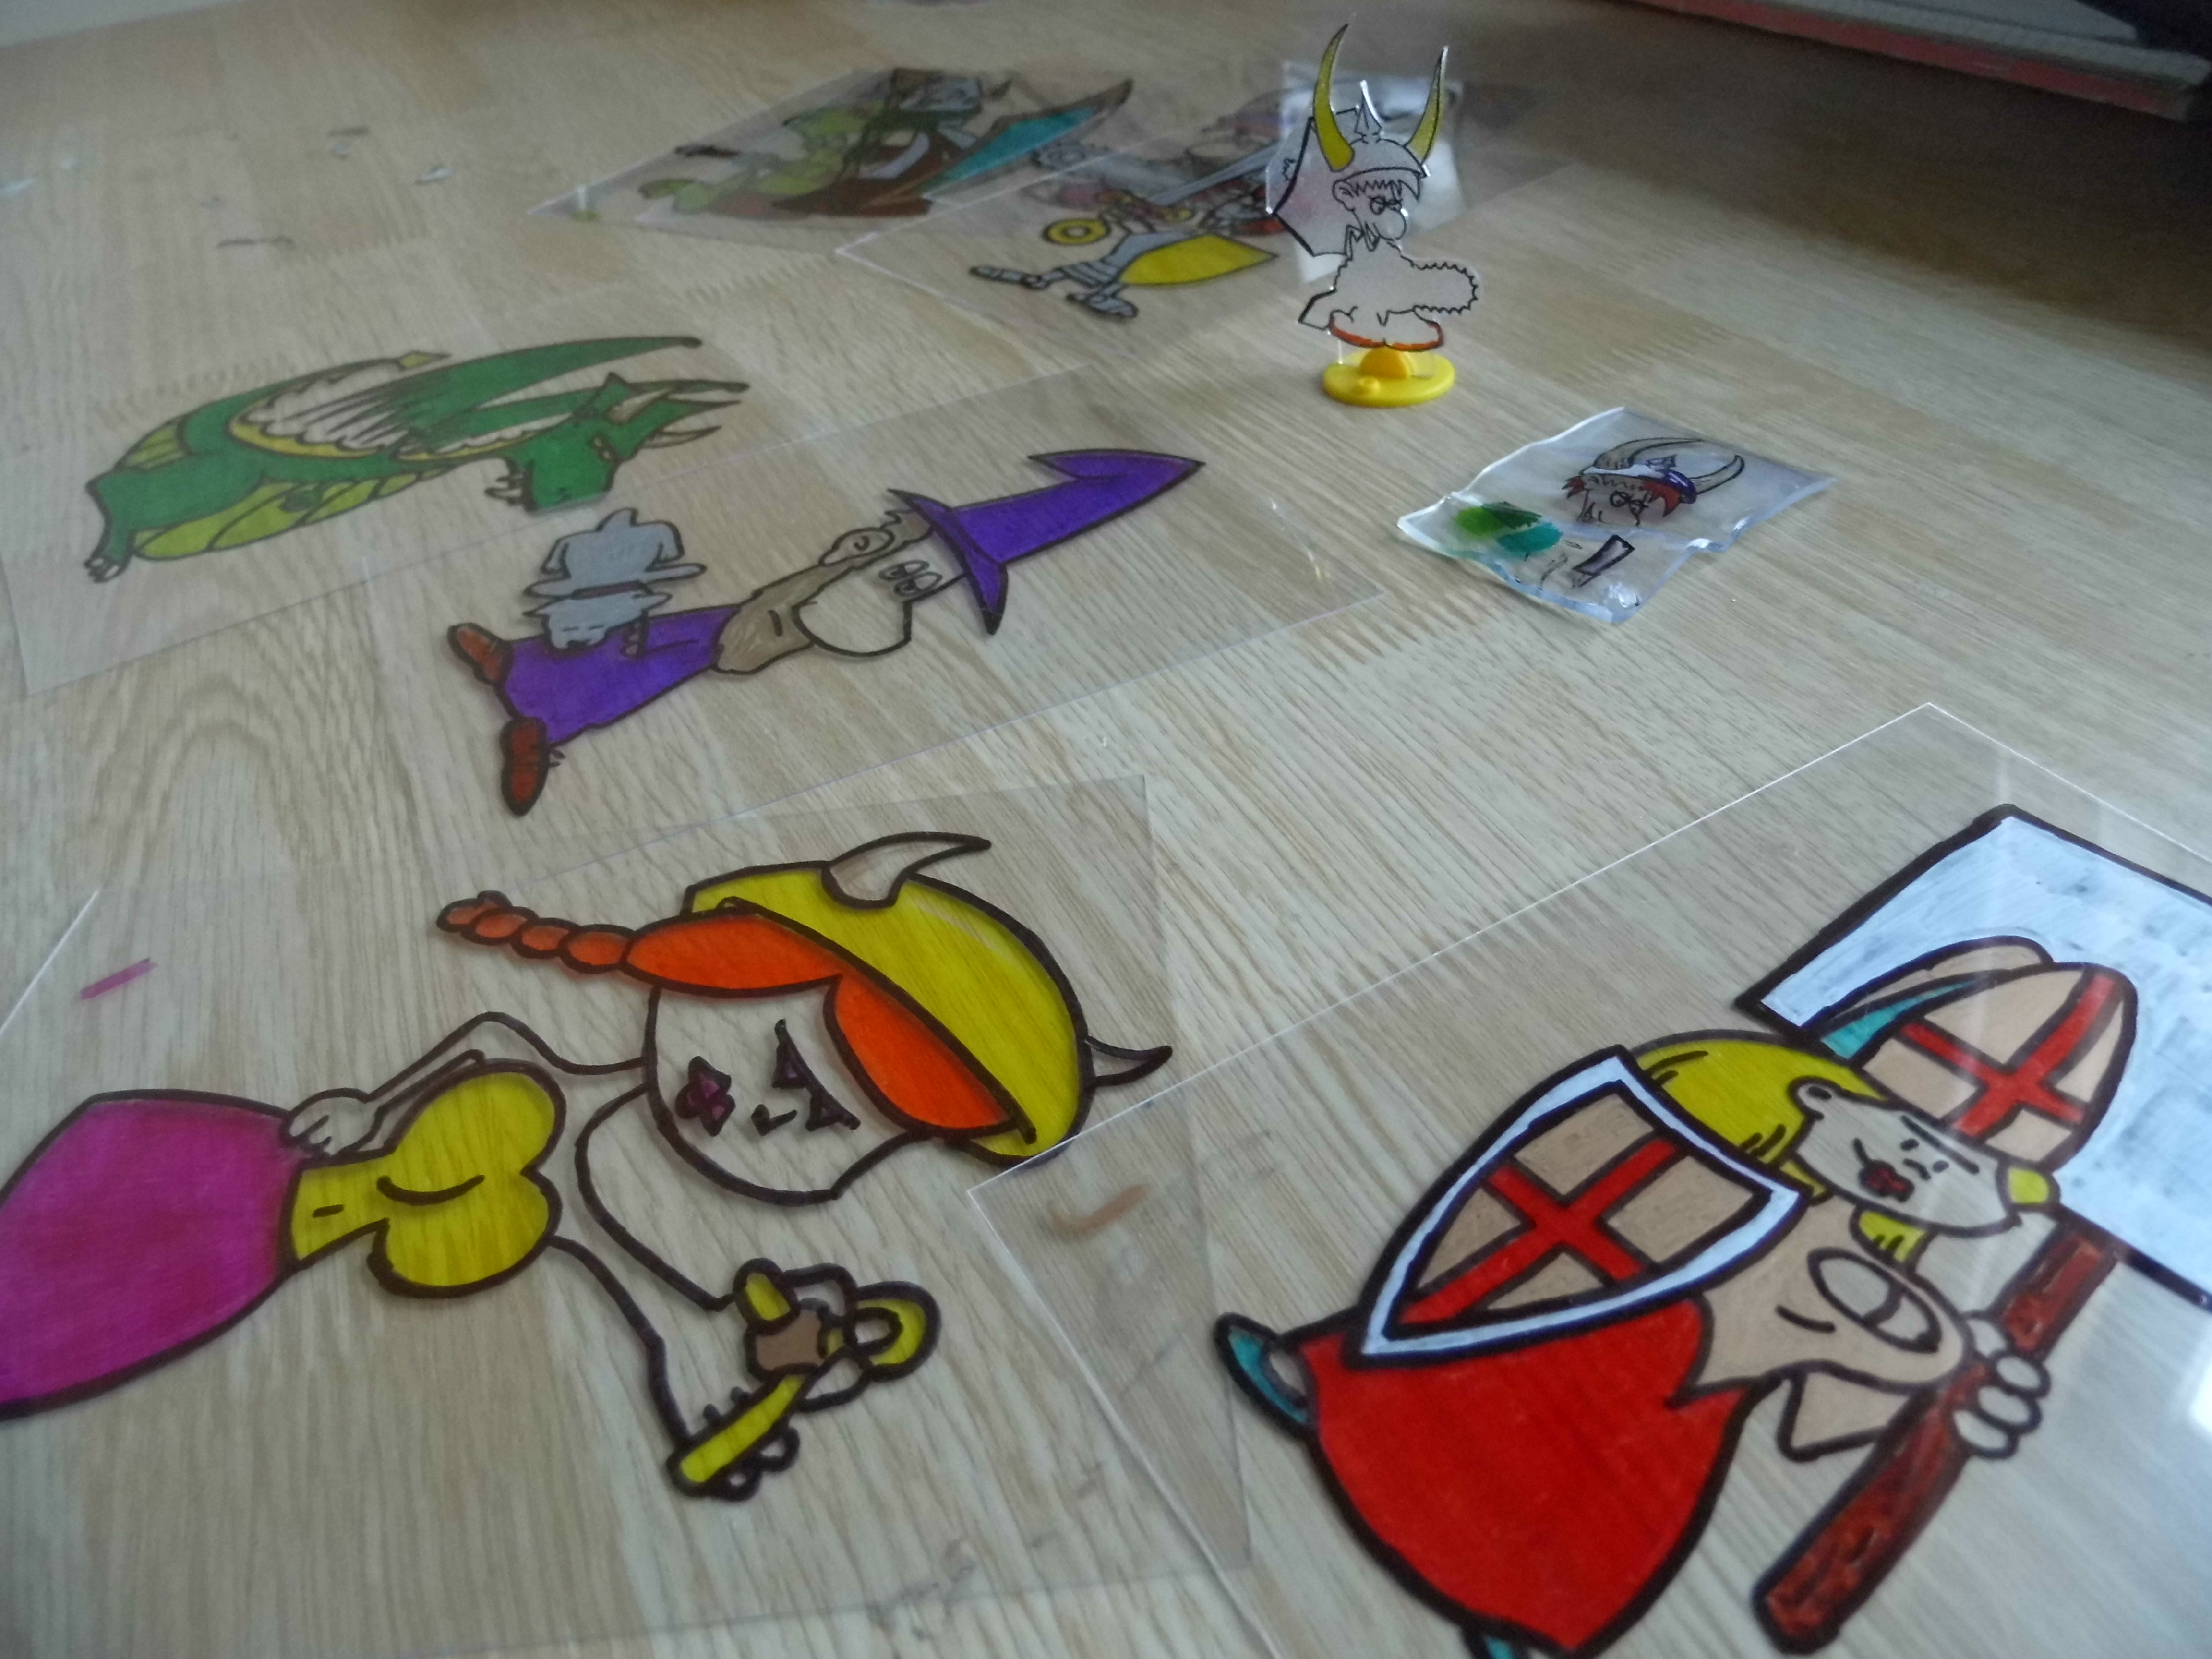
I set the oven to “grill” (PUNS.) and lined a baking tray with tin foil. Then, one by one, placed each sheet into the oven for a few minutes (until it goes all curly, shrinks down and flattens out again) before removing it and immediately pressing it under a heavy book in order to flatten out the piece. After touching them up a little bit with the markers where the ink slightly melted and smudged, they were placed in their plastic stands. Because one or two went badly wrong in the oven, and a couple ended up noticeably out of scale with the other playing pieces, I was left with six complete pieces: two male, two female and two monster-ish; which I put in stands, ready to play with 🙂

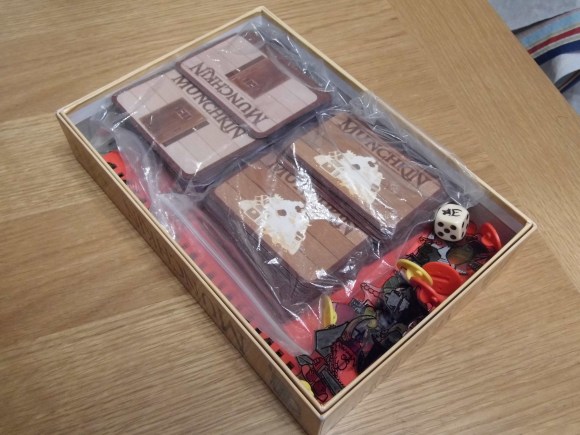
I’m pretty pleased! I think they look rad, even if no-one else agrees with me. Plus, everything still fits in my base Munchkin box, et voila:
So yeah, GO GO GADGET CREATIVITY.
[Zinar7]